Packet loss is degradation issue that reduces network performance, end-user experience, and integrity of transmitted data. Packet loss in your internet connection can severely affect the quality of online services, causing delays, dropped calls, and buffering during video streaming.
In this article, we will review the four main causes of network packet loss, along with possible solutions. After that, we will list six network performance monitoring tools available to test packet loss.
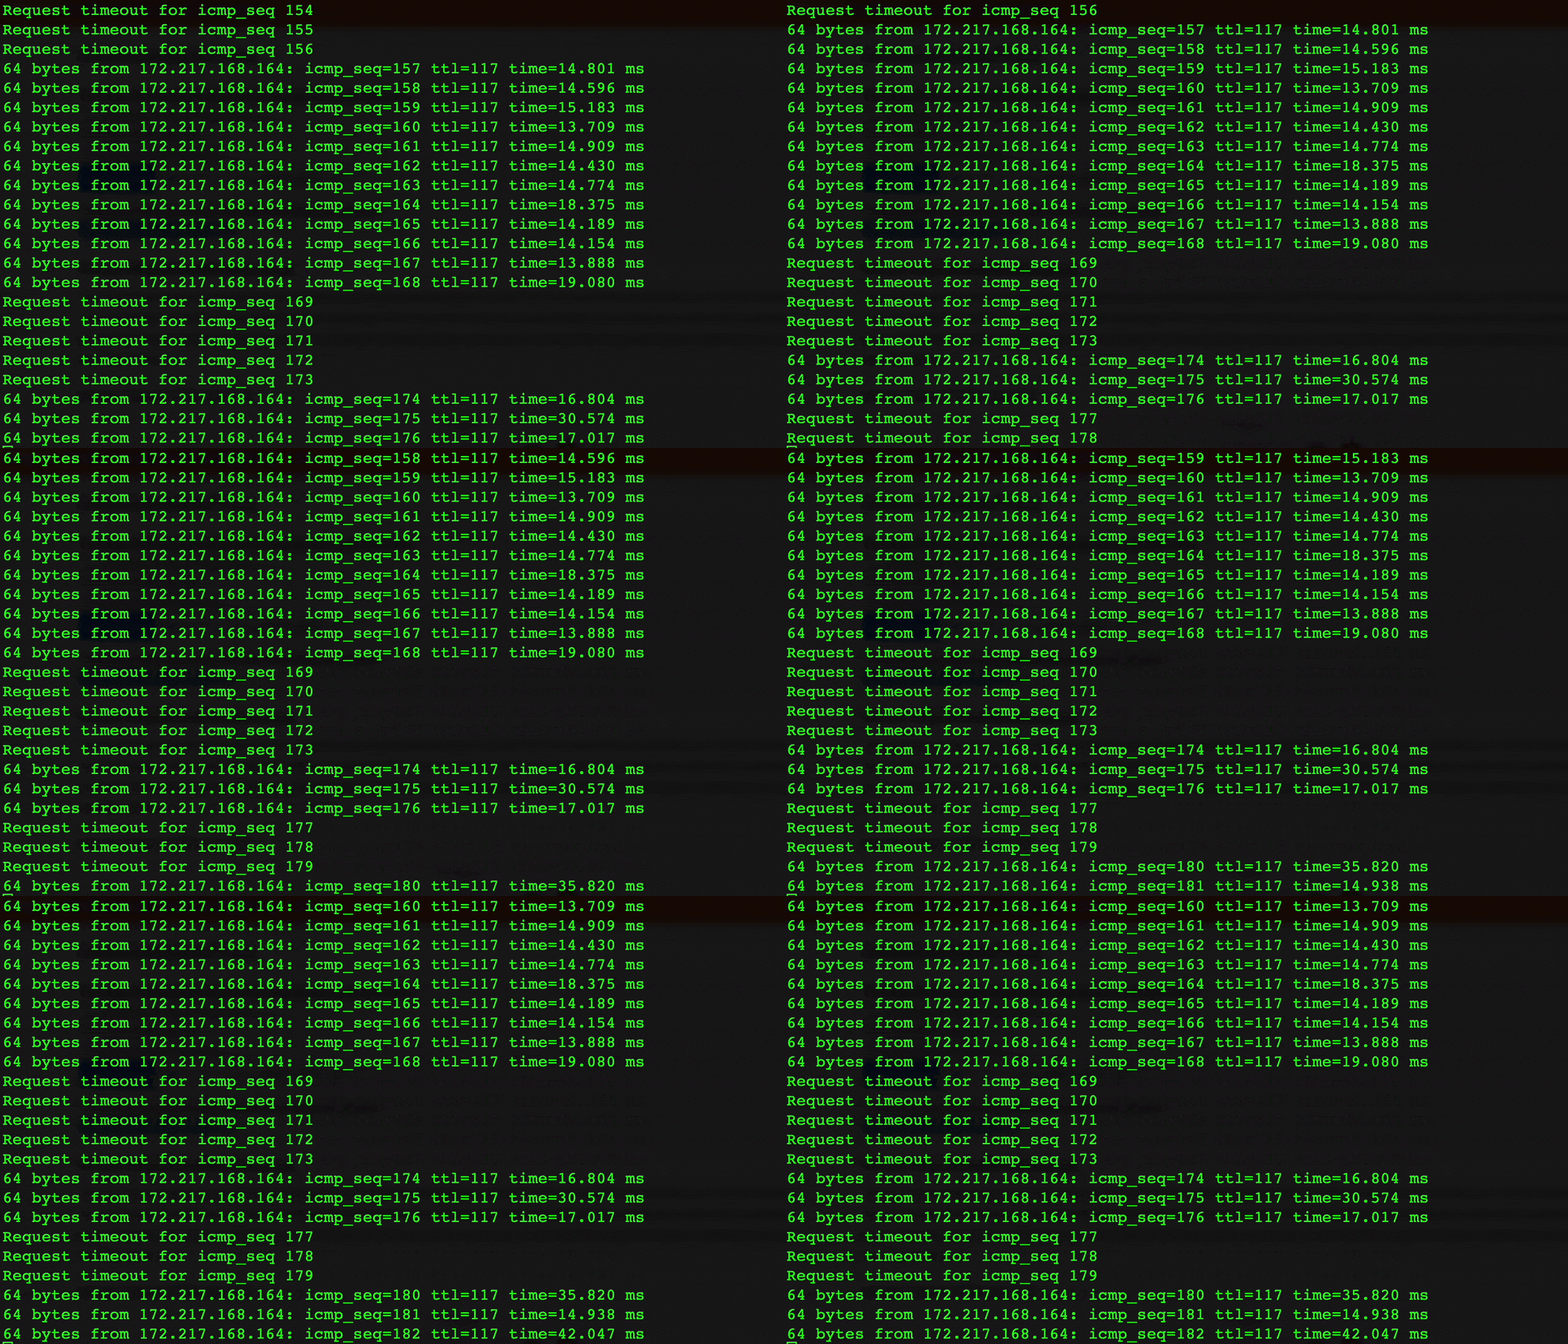
Packet Loss Definition
Packet loss occurs when the network packets transmitted across a network fail to reach their destination. When this happens, a fraction of network packets sent reach the destination. High packet loss rates have a negative impact on applications and digital services as it causes data transmission to be inconsistent and unpredictable.

It’s crucial to be proactive by testing packet loss to identify issues early enough to take appropriate measures to resolve data loss. Discover all you need to know to test packet loss, including:
- Tools for testing packet loss
- Effects of packet loss
- Causes and possible solutions
- Simulating packet loss
Tools for testing packet loss
Packet loss can be detected in different ways, and each method here listed has a specific context. It’s important to understand when it makes sense to use one or more approaches. In this section, we’ll introduce the tools that are capable of running packet loss tests:
Ping
Ping is the go to tool for packet loss testing and network latency measurement. This packet loss test can be executed from any computer’s console, as almost any operating system supports it. When you execute ping, by default it sends one packet every second to the destination host that you passed as argument. If the destination host is up and running, reachable, and allowed to respond, it will reply with an echo_reply packet to each echo_request by the sender. If the network between the two hosts has packet loss, some of these echo_request/echo_reply packets will be lost. That’s what goes into the packet loss calculation.
The following output from a ping test against netbeez.net with 10 packets (option -c as count). The source receives only 9 out of 10 replies, so the packet loss is 10%.
% ping -c 10 netbeez.net
PING netbeez.net (141.193.213.10): 56 data bytes
64 bytes from 141.193.213.10: icmp_seq=0 ttl=59 time=8.135 ms
64 bytes from 141.193.213.10: icmp_seq=1 ttl=59 time=15.771 ms
64 bytes from 141.193.213.10: icmp_seq=2 ttl=59 time=16.383 ms
64 bytes from 141.193.213.10: icmp_seq=3 ttl=59 time=17.835 ms
64 bytes from 141.193.213.10: icmp_seq=4 ttl=59 time=9.219 ms
64 bytes from 141.193.213.10: icmp_seq=5 ttl=59 time=15.211 ms
64 bytes from 141.193.213.10: icmp_seq=6 ttl=59 time=8.148 ms
64 bytes from 141.193.213.10: icmp_seq=7 ttl=59 time=16.280 ms
Request timeout for icmp_seq 8
64 bytes from 141.193.213.10: icmp_seq=9 ttl=59 time=8.001 ms
--- netbeez.net ping statistics ---

10 packets transmitted, 9 packets received, 10.0% packet loss
round-trip min/avg/max/stddev = 8.001/12.905/17.835/3.817 ms
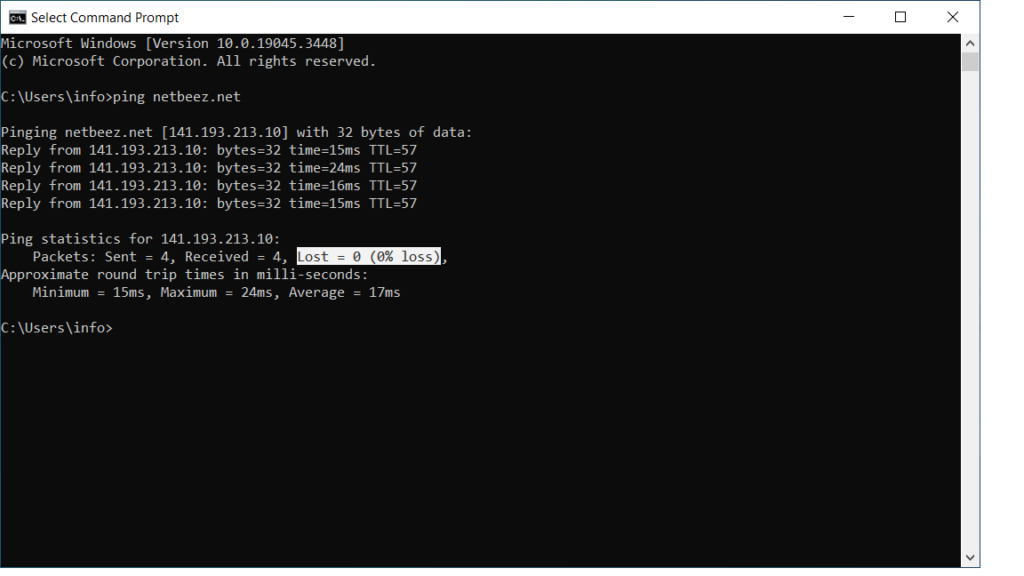
In Windows, just open a command prompt by typing cmd in the search bar next to the start menu. Once the command prompt opens, type ping followed by the remote IP or hostname. By default the windows ping runs 4 pings and then exists, reporting the packet loss. If you want to discover more ping options, read the article we wrote.
Iperf
Iperf is another packet loss test available that generates TCP or UDP traffic from one host to another. To use iperf, you need to run the iperf client on the sender host (iperf -c <server_address>), and the iperf server on the receiving host (iperf -s). When running in UDP mode (-u flag), iperf returns the amount of packets transmitted, and the packet loss. Iperf in UDP mode calculates the packet loss between two hosts. Read more about iperf in a previous article we wrote.
In the following example you can see a 10 Mbits/sec transfer with 0% packet loss.
------------------------------------------------------------
Client connecting to 10.0.20.5, UDP port 5001
Sending 1470 byte datagrams, IPG target: 1121.52 us (kalman adjust)
UDP buffer size: 0.16 MByte (default)
------------------------------------------------------------

[ 3] local 10.0.10.5 port 60603 connected with 10.0.20.5 port 5001
[ ID] Interval Transfer Bandwidth

[ 3] 0.0- 1.0 sec 1.22 MBytes 10.2 Mbits/sec
[ 3] 1.0- 2.0 sec 1.28 MBytes 10.8 Mbits/sec
[ 3] 2.0- 3.0 sec 1.25 MBytes 10.5 Mbits/sec
[ 3] 3.0- 4.0 sec 1.24 MBytes 10.4 Mbits/sec
[ 3] 4.0- 5.0 sec 1.26 MBytes 10.5 Mbits/sec
[ 3] 5.0- 6.0 sec 1.25 MBytes 10.5 Mbits/sec
[ 3] 6.0- 7.0 sec 1.25 MBytes 10.5 Mbits/sec
[ 3] 7.0- 8.0 sec 1.25 MBytes 10.5 Mbits/sec
[ 3] 8.0- 9.0 sec 1.25 MBytes 10.5 Mbits/sec
[ 3] 0.0-10.0 sec 12.5 MBytes 10.5 Mbits/sec
[ 3] Sent 8917 datagrams

[ 3] Server Report:
[ 3] 0.0-10.0 sec 12.5 MBytes 10.5 Mbits/sec 0.009 ms 0/ 8917 (0%)
MTR
MTR, which stands for Matt’s Traceroute, is another command line tool used to measure packet loss. This utility merges the functionalities of traceroute and ping. Like traceroute, it discovers all the routers between the source and destination, those at least that reply to requests. Like ping, it runs ping tests against all the discovered routers, and reports latency and packet loss.
MTR can be used to pinpoint issues at various points along the path(s) to the destination. In the following screenshot you can see that hops 3, 4, and 5 are having more than 25% of packet loss. That could indicate performance issues along the Internet path. Read about MTR in a previous article we wrote.

Internet speed test
NDT is an internet speed test utility that runs download and upload speed tests over an internet connection. For this reason, is used as an internet quality test. Along with latency, download and upload speed, NDT also reports the TCP retransmissions. TCP retransmissions are an indication of packet loss. The consortium for open measurements called the M-LAB (Measurement Lab) hosts the majority of the NDT servers. Some servers are also hosted by third parties around the world. You can also host your own server if interested.

Interface statistics
If you manage a node that you discovered is dropping packets, check the interfaces counters on the interfaces where the traffic flows. The command or method to see interfaces’ counters errors changes based on the vendor and platform. The good news is that you may be able to find the root cause of packet loss.
The following example illustrates the show command on a Cisco switch returns the number of frames with alignment, FCS (checksum), transmit, receive, and undersize errors.
#show interfaces counters errors

Port        Align-Err    FCS-Err   Xmit-Err    Rcv-Err UnderSize
Fa0/1               0          0          0          0         0
Fa0/2               0          0          0          0         0
Fa0/3               0          0          0          0         0
Fa0/4               0          0          0          0         0
Fa0/5               0          0          0          0         0
Fa0/6               0          0          0          0         0
Fa0/7               0          0          0          0         0
Fa0/8               0          0          0          0         0
Fa0/9               0          0          0   10112735         0
Fa0/10              0          0          0          0         0
Fa0/11              0          0          0          0         0
...
To monitor interface errors, an SNMP management tool like SolarWinds or Nagios would work.
Network monitoring tools
A network monitoring tool allows you to monitor network performance metrics automatically, and get alerts when network packet loss is detected. The following screenshot shows a ping test run by a NetBeez endpoint: the test reports packet loss rate and other statistics.
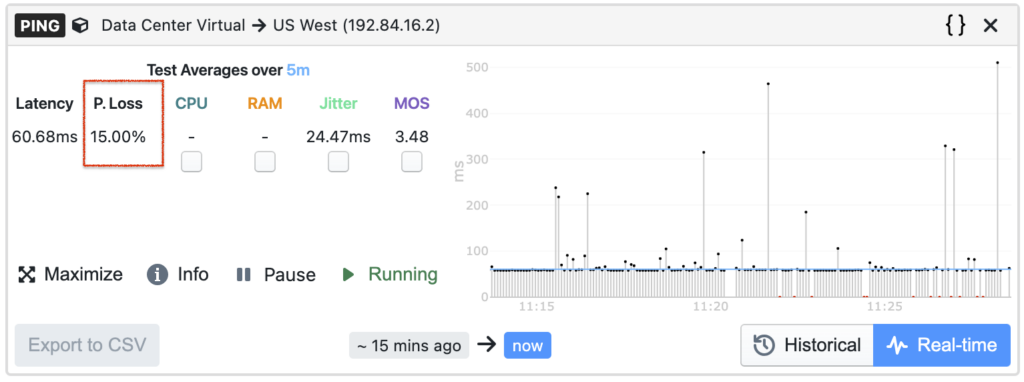
Testing Packet Loss with NetBeez
A network performance monitoring solution like NetBeez provides real-time visibility into packet loss, latency, jitter, and other network performance metrics. NetBeez simplifies packet loss monitoring across Wide Area Networks, Wireless LANs, and VPN connections. The dashboard provides a simple interface to detect and troubleshoot packet loss issues.

Step 1 – Deploy network testing agents
In this initial step, install the network monitoring agents that run network testing against your network and applications. The network testing data collected by these units will help collect data about network availability and performance. NetBeez provides two options:
- Network Agents are hardware, virtual or software appliances that get installed on-premise at remote branch offices and headquarters, or at public clouds and data centers.
- Remote Worker Agents are software clients for Windows or Mac operating systems that run on end-user laptops. These agents extend network performance testing beyond the corporate perimeter, including the network of work from home employees.
Consult the online documentation to see how you can install NetBeez agents.
Step 2 – Create network performance tests
The user configures on the user dashboard network monitoring tests such as ping, iperf, and internet speed to test packet loss. This is accomplished by configuring:
- Targets – Defined by URL or FQDN, a target includes a certain set of ping, DNS, HTTP, and traceroute tests to execute continuous network performance monitoring. These tests run continuously and return results in real time on the user dashboard.
- Scheduled tests – These are iperf, network speed, and VoIP tests that run at specific user defined times. Iperf is generally used to verify throughput between two NetBeez agents, or one agent and one external iperf server. Network speed helps measuring download and upload speed of an internet connection.
Step 3 – Configure packet loss alert profiles
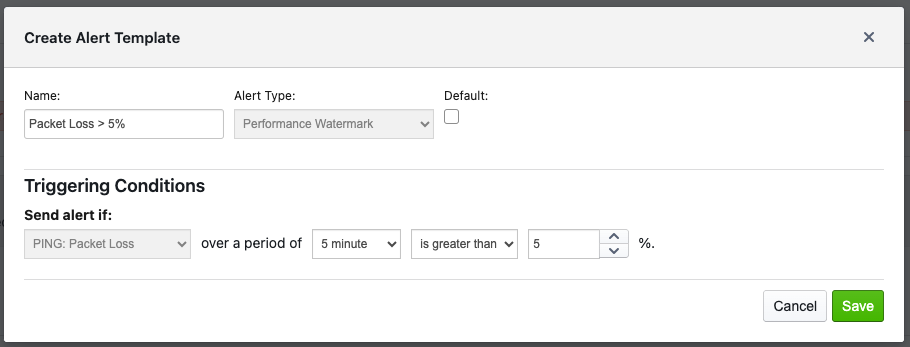
The network administrator assigns alert profiles to these tests to receive alerts for high packet loss rates. Alert profiles define the rules, or conditions, upon which an alert is triggered and associated notifications are delivered. For example, in the following screenshot reports an alert profile that triggers if the value exceeds 5% in a 5 minute window.
When a high packet loss alert is triggered, the network administrator can receive notifications via email, third-party integration, or standard protocol (e.g. Syslog, SNMP).
Step 4 – Review network performance testing data
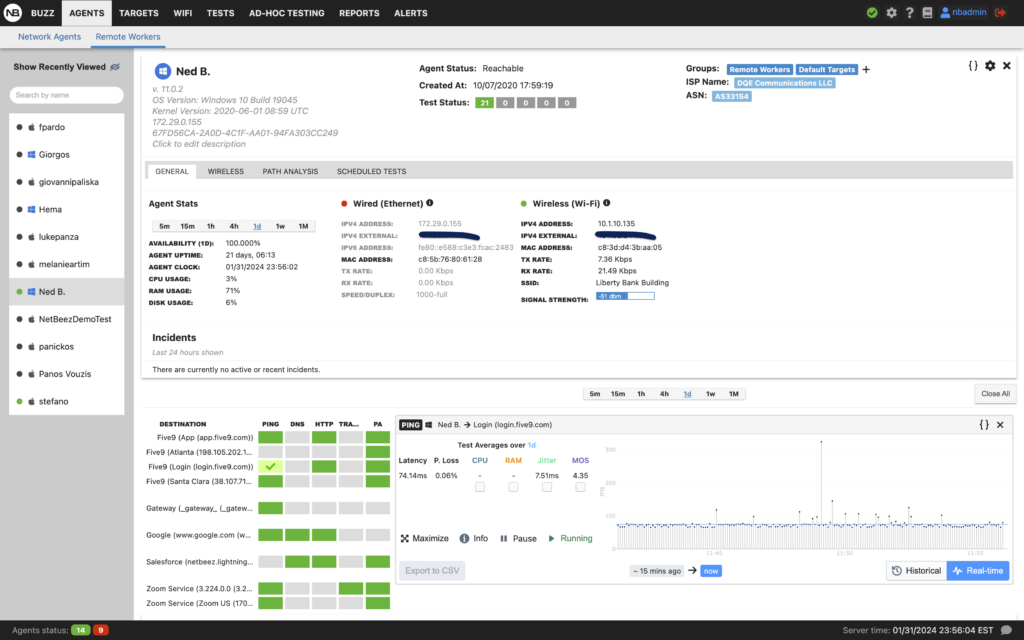
Once the targets and scheduled tests are configured, the agents will immediately start network testing and reporting data to the dashboard. In the following screenshot you can see the real time data gathered by a remote end-user on a Windows laptop. The network performance monitoring data includes latency, packet loss, and jitter. Network monitoring tools like NetBeez help capture the user experience of remote employees.
Effects of packet loss
Packet loss can have several negative implications on network performance, end-user experience, and different applications such as video streaming and video conferencing. When packet loss happens, it will cause:
- A reduction in throughput and page loading time due to the required retransmissions in the case of TCP connections.
- Disruption of UDP communications in the case of real-time voice, video calls, etc.
For this reason, it’s important to detect and remediate packet loss as soon as possible. There are several tools and troubleshooting techniques available. Each one of them has a specific function, goal, and requirements.
Causes and possible solutions for packet loss
There are several possible causes of packet loss. When this happens, it’s important to do a network analysis and consider all of them. The troubleshooting process will help eliminate those that don’t apply to a specific case. Here are some of the most common causes for packet loss.
Hardware failures
Hardware failures caused by faulty network equipment, outdate router firmware, or bad network cables such as degraded connectors or dirty fiber optics. The best way to identify network hardware failures is to inspect the condition of the devices and use appropriate testers in the case of cables or fiber.
Network congestion
Network congestion occurs when the network traffic originated is higher than what the network can forward. As a result, devices’ buffers will start filling up, data packets’ response times will increase, and connections will get dropped. High internet traffic during peak hours can slow down or disrupt connectivity, especially on shared networks.
Wireless Interference
In wireless networks, interference happens when there’s signal overlap from other wireless networks, or devices, such as electronic appliances. A wireless signal weakens due to physical barriers like walls, water tanks, or metallic surfaces, being another reason for wireless interference and packet loss.
Configuration changes or software errors
Incorrect configuration settings, or outdated firmware on devices can cause packet loss. For example speed-duplex mismatches between two neighbors, incorrect QoS parameters, etc.
Simulating Packet Loss
Sometimes it’s required to simulate packet loss to test network configurations, or verify how an application behaves under such situation. If you need to simulate packet loss, Linux offers a relatively simple to use utility called Traffic Control (TC). Without explaining the syntax in detail, here is now to introduce a packet loss of 10% with tc:
tc qdisc add dev eth0 root netem loss 10%To delete the rule and remove packet loss, use the following command:
$ tc qdisc del dev eth0 rootIf you want to learn more about this, we wrote an article explains how to use Traffic Control in Linux.
Conclusion
Packet loss measurements provide key insights into the health of a network infrastructure. By proactively identifying packet drop issues, network administrators can take appropriate measures to resolve them. Addressing packet loss promptly will significantly improve end-user experience and prevent disruptions in critical activities. There are many ways to run packet loss tests available via command line, such as ping or iperf. However, if you are looking for a packet loss testing tool for your entire network, request a demo or a free trial of NetBeez network performance monitor. NetBeez provides packet loss monitoring and much more.


