Introduction to WiFi and WiFi Troubleshooting
Wi-Fi networks, or WLANs, enable laptops and other mobile devices to communicate with other devices without needing a wired connection. Wireless networks use Radio Frequency (RF) waves that flow through the air and the surrounding space. This is a simple yet important reminder when troubleshooting WiFi connectivity problems. When troubleshooting Wi-Fi network problems, always consider the spatial environment where a WiFi network is located.
Troubleshooting WiFi Signal Issues
WiFi Strength Issues
Attenuation is the reduction in strength of an RF signal that weakens with its distance from the source. In WiFi, signal strength is measured in decibel milliwatts (dBm). Values can vary from a strong signal at -30 dBm to a very weak one at -90 dBm, generally considered the noise floor. Distance is not the only source of attenuation. Some physical obstacles can absorb and reduce the signal strength, while some others can also cause the signal to bounce off them, changing the expected shape of the coverage area.
WiFi Interference
WiFi interference, or noise, happens when two or more devices transmit at the same time using the same frequency. Noise is measured in dBm and its values can go from a high value of 0 dBm to a null value of -120 dBm. In WiFi, signal interference happens when another wireless network transmits using the same channel. This type of interference is relatively easy to identify as any operating system has a function to display locally available WLANs. A more difficult source of interference happens when the interfering source isn’t a WiFi device. In this case, to identify this type of interference the troubleshooter needs a spectrum analyzer. Spectrum analyzers are specialized hardware devices that detect and display RF signals using WiFi frequencies.
Signal to Noise Ratio
Signal to Noise Ratio (SNR) is a wifi performance metric that includes signal strength and noise. SNR is measured in decibel (dB) and it is calculated by subtracting the noise value from the signal value. So for instance if signal strength is -65 dBm and the noise is -90 dBm, the SNR is:
-65 – (-90) = 25 dB
High values (120 dB is the max) are better than low values (0 dB is the min). Acceptable values start around 20 dB.
Other WiFi Issues
Outside signal related issues, there are other factors that impact wireless performance. These problems include software misconfigurations, like firmware bugs, suboptimal network configuration settings, and network congestion issues. Oftentimes, it’s the responsibility of the wireless engineer or network administrator to address these types of issues if the wireless is part of an enterprise network. The end-user can open a ticket with the local IT support. In the case of home users, they may have to escalate internet connection issues to the internet service provider’s support team.
Simple Guide for WiFi Troubleshooting
There are few simple steps that a network troubleshooter can take to address most wifi performance issues. Each step is related to a specific problem that the user identified during the troubleshooting phase. The troubleshooting we highlight here is limited to common functionality implemented by most operating systems such as Windows or MacOS.
Verify WiFi Signal Coverage
The first step in evaluating Wi-Fi connection problems is to recognize that we are experiencing such an issue. On the desktop, the user should locate the WiFi icon and click on it. For example on a Mac, the Wi-Fi icon is on the top right corner. Clicking on it while pressing the option button, Mac OS prints detailed information about the Wi-Fi network connection and the quality of the wireless signal.
Here, I can review the RSSI and Noise data to verify if I am having an attenuation or noise problem. The RSSI is the Received Signal Strength Indicator that informs the user about the strength in dBm of the received signal. Noise is the interference measurement in dBm. To get the SNR, I simply subtract the noise value from the RSSI value (-42 – ( -96)) = 54. In this case, I have an excellent SNR value. However, if I had gotten a lower RSSI ( e.g. < -70 dBm) or higher noise ( e.g. < – 90 dBm), I would have to take appropriate actions.
In Windows, troubleshooting Wi-Fi connections is a bit different. The Wi-Fi icon provides a bar indication on the strength of the signal, where three bars indicate a good signal, and the name of the the wireless network connected. This information is good but basic to troubleshoot connectivity issues.
Users that are familiar with command prompt, can also use the netsh command to get a quality index of signal strength (in the below case it is equal to 100%):
While we wish also Windows would have provided signal strength and noise values in dBm, we have to work with a signal quality score. Here’s a reference about the signal quality reported by Windows:
- Good signal: Typically around 70% or higher
- Moderate signal: Between 30% and 70%
- Weak signal: Below 30%
Evaluate Environment
Once we determine that the signal strength is weak, or the noise is too high, we evaluate the local environment. This is a very important step as it will help you determine where the problem could be. Visually inspect the area (wireless engineers call it “site surveys”), and try to locate where’s the access point that you are connecting to. Analyze if there are any obstacles on the Line Of Sight (LOS) between the access point and your laptop or mobile device. In this step, you are basically trying to move closer to the access point, remove any object that could increase attenuation, or identify electric equipment (such as microwaves) that generate noise.
Check Your Network Settings
Similar to macOS, Windows also provides a graphical user interface (GUI) for managing Wi-Fi settings. These settings include information about the wireless adapter and network configuration settings such as the local host’s IP address, DNS servers, and the name of the SSID that the client is connected to. The following screenshot provides an overview of the wifi settings configured. Most of users will be fine with the default settings. However, for more advanced settings, it’s recommended to access the device manager accessible from the start menu bar.
When checking the network settings, it’s important to verify that the IP and DNS servers assignment is set to DHCP. Unless of special cases, generally Wi-Fi networks are configured to automatically provide host IP, DNS servers, and gateway addresses. If you have statically configured network settings, ensure that it was intentionally set.
Advanced WiFi Troubleshooting Techniques
The previous section mostly covered troubleshooting techniques that end-users can perform when dealing with WiFi problems. Let’s now briefly introduce the tools and techniques available to network and wireless engineers. These tools and techniques can go from open source software solutions to paid ones, including specialized WiFi testing hardware.
Using Diagnostic Tools
Diagnostic tools provide critical insights for resolving WiFi performance issues. Command-line utilities, available on Windows, macOS, and Linux, are foundational for basic diagnostics. For example, ping and tracert on Windows or traceroute on macOS and Linux allow IT teams to test network connectivity and routing. Linux-specific tools like iwconfig and iwlist enable deeper examination of wireless interfaces, including signal strength and available networks. These built-in tools are accessible, lightweight, and effective for quick troubleshooting.
For deeper analysis, packet capture applications such as tcpdump (command-line) and Wireshark (GUI-based) offer the ability to inspect network traffic at a granular level. These tools are invaluable for diagnosing issues like packet loss, retransmissions, or protocol misconfigurations. Additionally, spectrum analyzers detect interference from both WiFi and non-WiFi sources, such as microwaves or cordless phones, helping to optimize signal quality. Finally, WiFi hardware probes provide continuous monitoring of WLAN performance, offering proactive alerts and service assurance to maintain optimal network health. Together, these tools create a comprehensive diagnostic toolkit for IT teams.
Network Monitoring and Testing
Network monitoring and testing play distinct yet complementary roles in WiFi troubleshooting. Traditional device monitoring, often performed with protocols like SNMP, focuses on the health and performance of network hardware, such as routers, switches, and access points, ensuring these components are operating correctly. While critical, this approach does not capture the actual user experience.
In contrast, end-user experience monitoring uses active network testing to simulate real-world conditions, assessing Wi-Fi signal strength, latency, packet loss, and overall Wi-Fi connection quality. This method provides a more accurate reflection of how end-users interact with a WiFi network and applications, identifying issues like poor signal coverage or high interference that could impact productivity. By combining both strategies, IT teams gain comprehensive visibility into network operations and user performance, enabling proactive resolution of WiFi problems.
NetBeez WiFi Monitoring
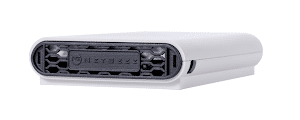
NetBeez simplifies WiFi monitoring and troubleshooting by providing end-to-end visibility into WLAN and LAN performance from the end-user’s perspective. Deploying Wi-Fi 6E sensors at remote offices provides a continuous testing solution for Wi-Fi connectivity. The sensors constantly check the quality of the local Wi-Fi network, alerting the support staff when a wifi connection or internet connection issue arises.

The agents continuously test and report metrics on WiFi connectivity, network latency, internet speed, and application performance. This proactive approach enables IT teams to detect issues like signal degradation, high latency, or packet loss before they impact productivity.

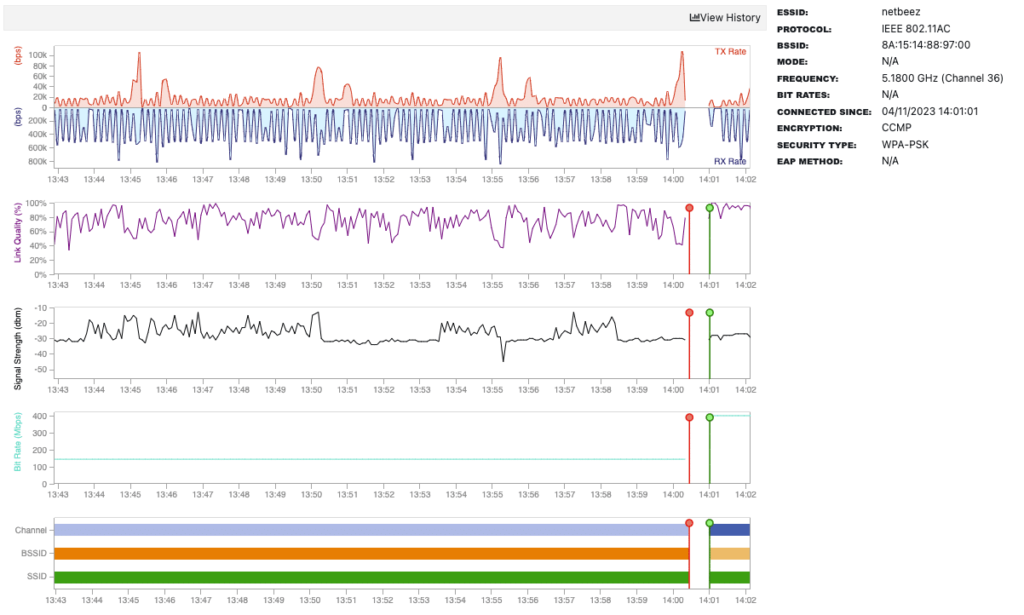
For example, NetBeez’s real-time monitoring of WiFi performance can identify dead zones, channel interference, or overloaded channels in home networks. Its dashboards consolidate performance data, allowing IT teams to quickly diagnose issues remotely without relying on end-users to report problems. Additionally, tools like synthetic testing and application monitoring help IT teams determine whether issues stem from local WiFi setups or external factors like internet connection issues or misconfigured VPNs.
Sensor-based WiFi monitoring reduces the mean time to resolution (MTTR) and empowers IT teams to deliver a seamless work-from-home experience.
| Feature | Description |
| WiFi performance metrics | NetBeez agents collect real-time WiFi signal strength, noise, and link quality data for coverage and interference analysis. |
| WiFi connection timing | NetBeez WiFi 6E sensors test and time the association with access points, radius authentication, and DHCP time to WLANs. |
| SSID scanning | NetBeez agents can perform SSID scans to identify overlapping wifi networks in proximity. |
| WiFi packet capture | NetBeez WiFi 6E sensors can run ad-hoc packet capture on three bands: 2.4 GHz, 5.0 GHz, and 6.0 GHz. |
| Synthetic network monitoring | NetBeez agents run network and application tests to monitor application availability and response times, including network speed tests with download and upload speeds. |
Conclusion on WiFi troubleshooting
In conclusion, effective WiFi troubleshooting requires a combination of foundational understanding, practical steps, and advanced tools. By addressing signal strength issues, interference, and environmental factors, end-users can resolve many Wi-Fi issues that cause internet connection issues. Advanced diagnostic tools and active monitoring approaches, such as those offered by platforms like NetBeez, empower IT teams to detect and address deeper performance issues, ensuring robust and reliable Wi-Fi for both end-users and critical applications. With the right techniques and tools, IT teams can transform WiFi troubleshooting from a reactive challenge into a proactive solution, delivering seamless connectivity experiences. If you want to learn more about NetBeez, request a demo or a free-trial.


