JPerf stands for Java Perf; it’s a GUI for running iPerf without having to bother learning the Command Line Interface (CLI) options. This is a convenient tool to have in your belt. In this post you’ll learn how to use it and a trick to update it to the latest version. Be sure to note that JPerf supports iPerf version 2, and not the latest iPerf version 3.
JPerf Installation
First of all let’s see how to download it and launch it on Windows and MAC OS.
Running on MAC:
- Download the tar file https://sourceforge.net/projects/iperf/files/jperf/jperf%202.0.0/
- Double-click to untar
- From the Terminal navigate to the untarred directory
- chmod +x jperf.sh
- brew install iperf
- In the terminal run ./jperf.sh
Running on Windows:
- Download the zip file https://sourceforge.net/projects/iperf/files/jperf/jperf%202.0.0/
- Unzip
- Move to directory and click on jperf.bat
If everything goes as planned, you should see this tool on windows: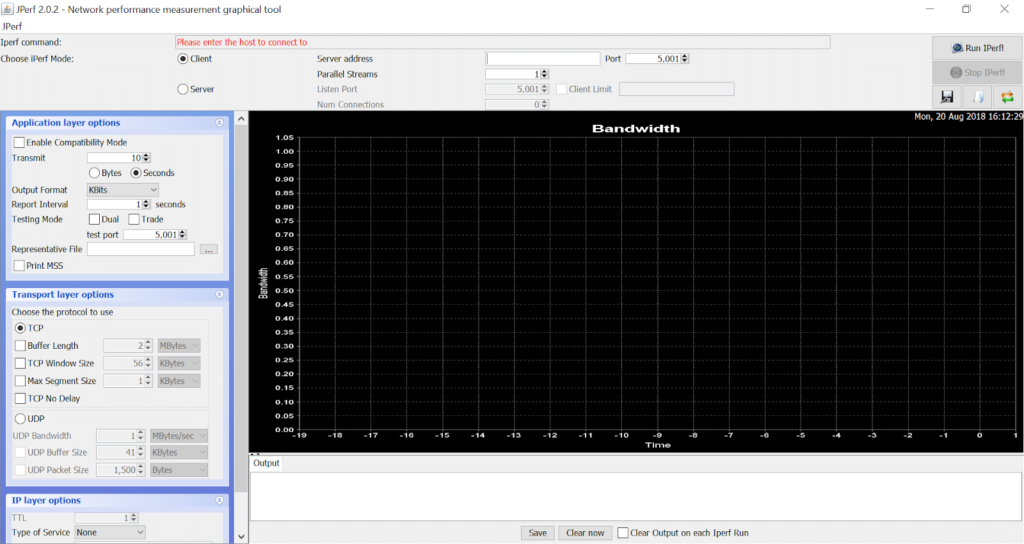
JPerf Upgrade
JPerf is just a wrapper for the iPerf executable that comes in the zipped file. By default, when you download it, you get iPerf version 1.7.0 which dates back to 2003. Although optional, it’s a good idea to upgrade to a newer version of iPerf. Here is how to do that:
- Download iPerf 2.0.9
- Unzip the iPerf bundle in a directory
- Copy all the unzipped files of iPerf 2.0.9 and paste them in the bin directory
In more detail, here are the files that need to be copied from the unzipped iPerf 2.0.9 directory: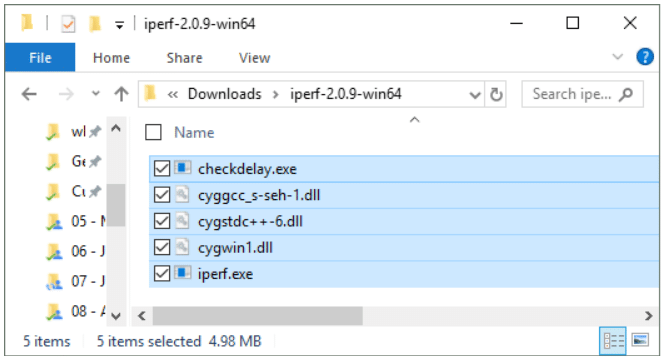
Here is how the bin/ directory originally looks: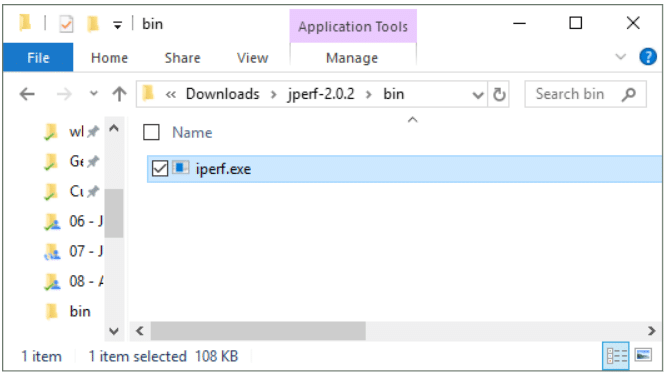
And here is what it looks like after copying the iPerf 2.0.9 files in it: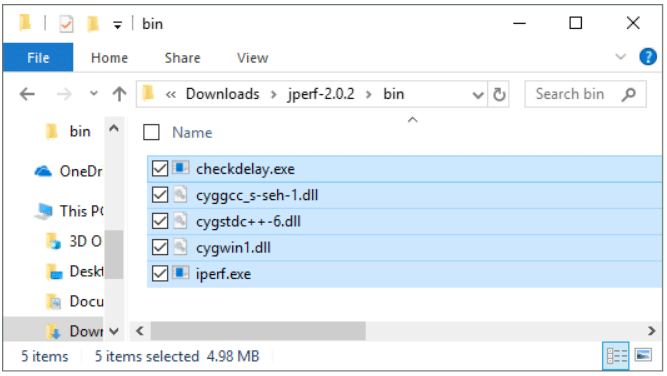
You will need to replace the old iperf.exe with the new one. Now when you run JPerf, you will be using iPerf version 2.0.9 from 2016 and not the outdated 1.7.0 version from 2003.
Now, let’s get to some action!
The Server
Obviously, the principles of this tool follow those of iPerf: you need two hosts to send and receive traffic. You can use JPerf to set up two different laptops (as a client and a server) to send traffic between them. First, you have to start the server in order to listen for incoming traffic:
- Open JPerf by clicking on jperf.bat
- Choose the “Server” option and the port to listen to (in red below)
- Click the “Run Iperf!” button (in blue below)
(If prompted by Windows to allow inbound traffic, then click “Allow Access”)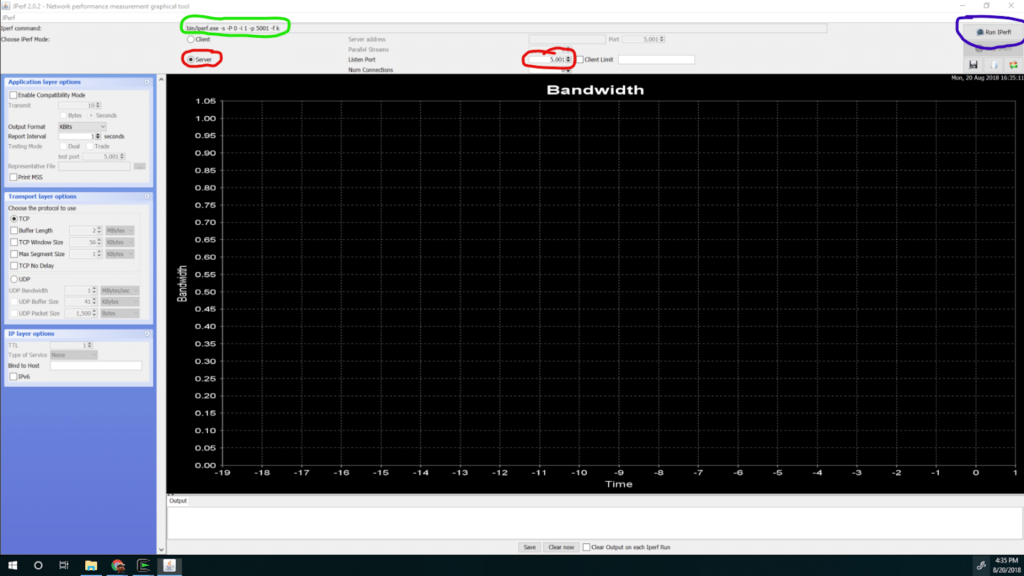
In green, you can see the command that is needed to run the same server on the command line interface.
When finished, you can stop the server from running on the laptop by using the “Stop IPerf!” button.
The Client
Now that the server is listening, it’s time to hit it with some traffic. On another laptop follow these steps:
- Open the client by clicking on jperf.bat
- Choose the “Client” option
- Input the IP and the port of the server (in red below)
- Click the “Run Iperf!” button (in blue below)
Note that there has to be a route from the client to the server, and the port has to be open to receive traffic.
If everything goes well, you should see a plot like this one: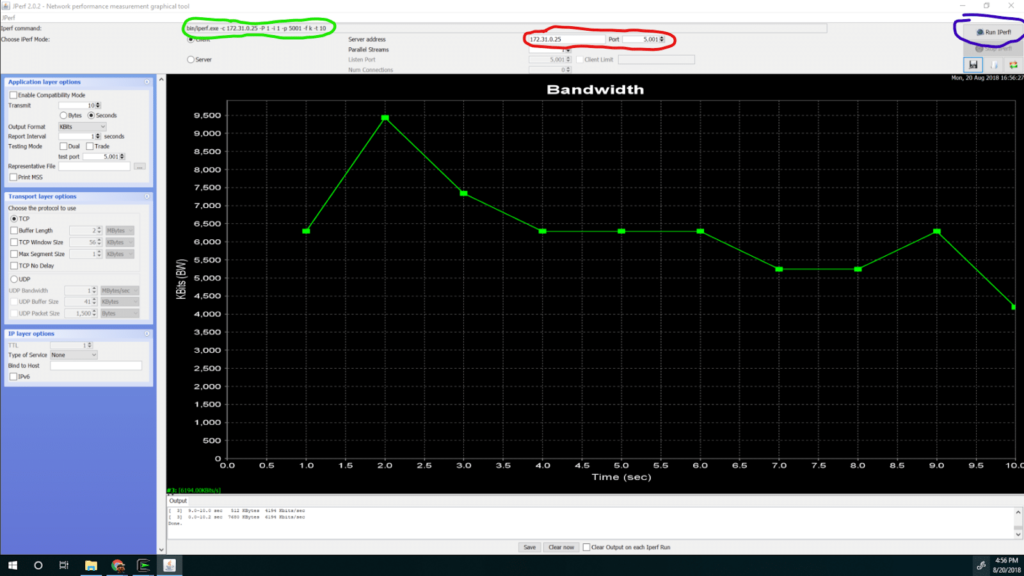
Congratulations! You have successfully run a bandwidth test!
Since this tool uses iPerf on the backend, you can combine it with iPerf. You can do this by running it on Linux or any other operating system as a server or a client.
Of course, JPerf/iPerf gives you a ton of options that you can tweak when you run your tests. You can learn more about iPerf by reading our posts here.